

The Server Labs Blog

Agility with guardrails: how today’s CIOs help teams innovate while ensuring security and…
The Server Labs

As a CIO, one of your top priorities is enabling your technology teams to innovate while maintaining regulatory compliance and security. That’s certainly what we hear time and time again from the CIOs we work with.
Navigating Cloud Migration with AWS: Understanding the Seven R’s
Paul Parsons
In the dynamic realm of cloud computing, migrating to the cloud has become a transformative endeavour for businesses seeking to embrace agility, scalability, and cost-efficiency. AWS’s Well-Architected Framework provides a robust and structured approach to cloud migration, guiding organisations through a well-defined process that prioritises security, performance, and reliability. At the hear
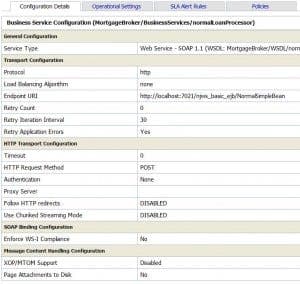
ALSB/OSB customization using WLST
Paul Parsons
One of the primary tasks in release management is environment promotion. From development to test or from test to production, environment promotion is a step which should be as much automated as possible.
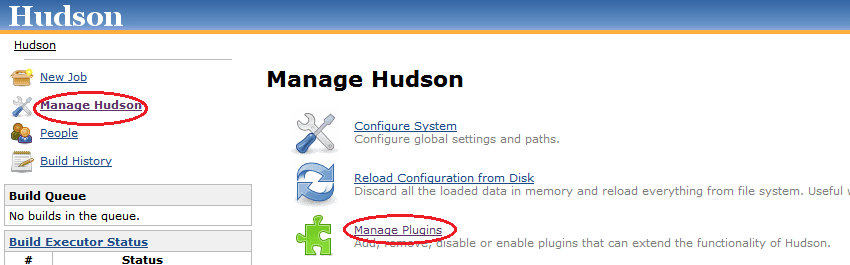
Creating Sonar Reports from Hudson
Paul Parsons
In order to guarantee the quality of software development projects, it is important to be able to verify that a continuous integration build meets a minimum set of quality control criteria. The open source project Hudson provides the popular continuous integration server we will use throughout our example. Similarly, So
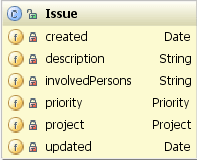
Smooks processing recipies
Paul Parsons
In one of our customer projects we had a requirement to import CSV, fixed length and Excel files in different formats and store records in the database. We chose Smooks to accomplish this task.
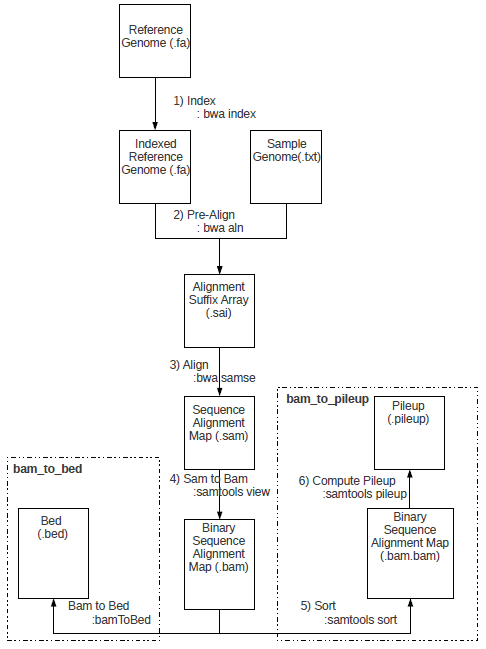
Genomic Processing in the Cloud
Paul Parsons
Over the last decade, a new trend has manifested itself in the field of genomic processing. With the advent of the new generation of DNA sequencers has come an explosion in the throughput of DNA sequencing, resulting in the cost per base of generated sequences falling dramatically. Consequently, the bottleneck in sequencing projects around the world has shifted from obtaining DNA reads to the

SCA Async/Conversational services Part 2: Non-SCA Web Service client
Paul Parsons
Following my previous post on the internals of asynchronous and conversational services in Tuscany SCA, which options are available for consuming these services when you cannot use a Tuscany SCA runtime on the client?.
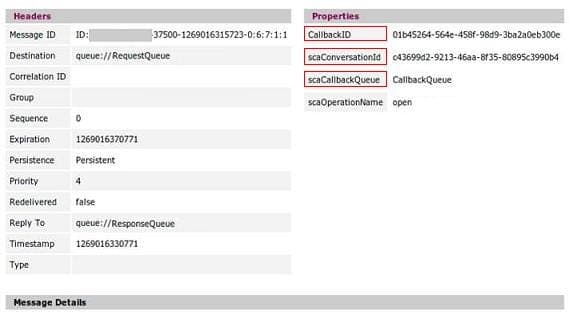
SCA Async/Conversational services Part 1: Internals of Tuscany SCA
Paul Parsons
Sometime ago I wrote about developing applications with SCA on a JBI-based infrastructure, using simple SCA services for that.
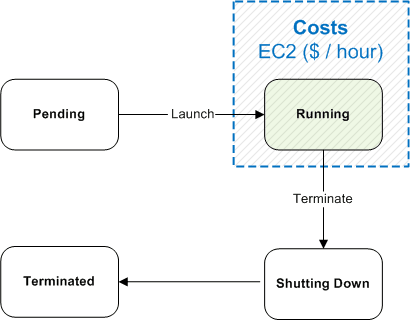
Persistence Strategies for Amazon EC2
Paul Parsons
At The Server Labs, we often run into a need that comes naturally with the on-demand nature of Cloud Computing. Namely, we’d like to keep our team’s AWS bill in check by ensuring that we can safely turn off our Amazon EC2 instances when not in use. In fact, we’d like to take this practice one step further and automate the times when an instance should be operational (e.g. only during business

Dynamic LDAP-based authentication and authorization in Servicemix 3
Paul Parsons
Recently, we have been working quite extensively with Apache Servicemix, a JBI-compliant ESB.
One of areas we have been looking into is securing services in general and how to perform ldap-based authentication and authorization for those services in particula